On this page
This is the documentation for Tiny Support, a knowledge base & documentation theme for Ghost, made by Kick Wheel Themes. You can view it in the Ghost.org theme store or purchase it here for $69.
Thank you for purchasing this theme. This guide outlines how to get set up, how to manage content, and how to customise the theme. We assume you are familiar with Ghost so we’ve only outlined steps specific to the theme. For more general Ghost help please check Ghost’s website.
If you're still stuck after reading these docs, please email hello@kickwheelthemes.com. We will respond within 3 business days (usually much quicker).
Ghost calls entries posts. Most knowledge bases call these articles so that’s what the theme does. In these docs we refer to posts/articles interchangeably.
Ghost organises posts using tags. Most knowledge bases call these topics so that’s what the theme does. URLs also reflect this – instead of
domain.com/tags/billing we have domain.com/topics/billingUploading the theme
- In Ghost Admin go to
Settings → Design & Branding → Customize → Change thtme (bottom right) - Click
Upload themein top right - Upload the
theme-name.zipfolder, then select the theme and clickActivate
More details can be found on Ghost’s website if needed.
Initial Setup
This theme requires a few initial steps to make Ghost perfect for use as a knowledge base. After this setup, managing content will be straightforward to anyone familiar with Ghost.
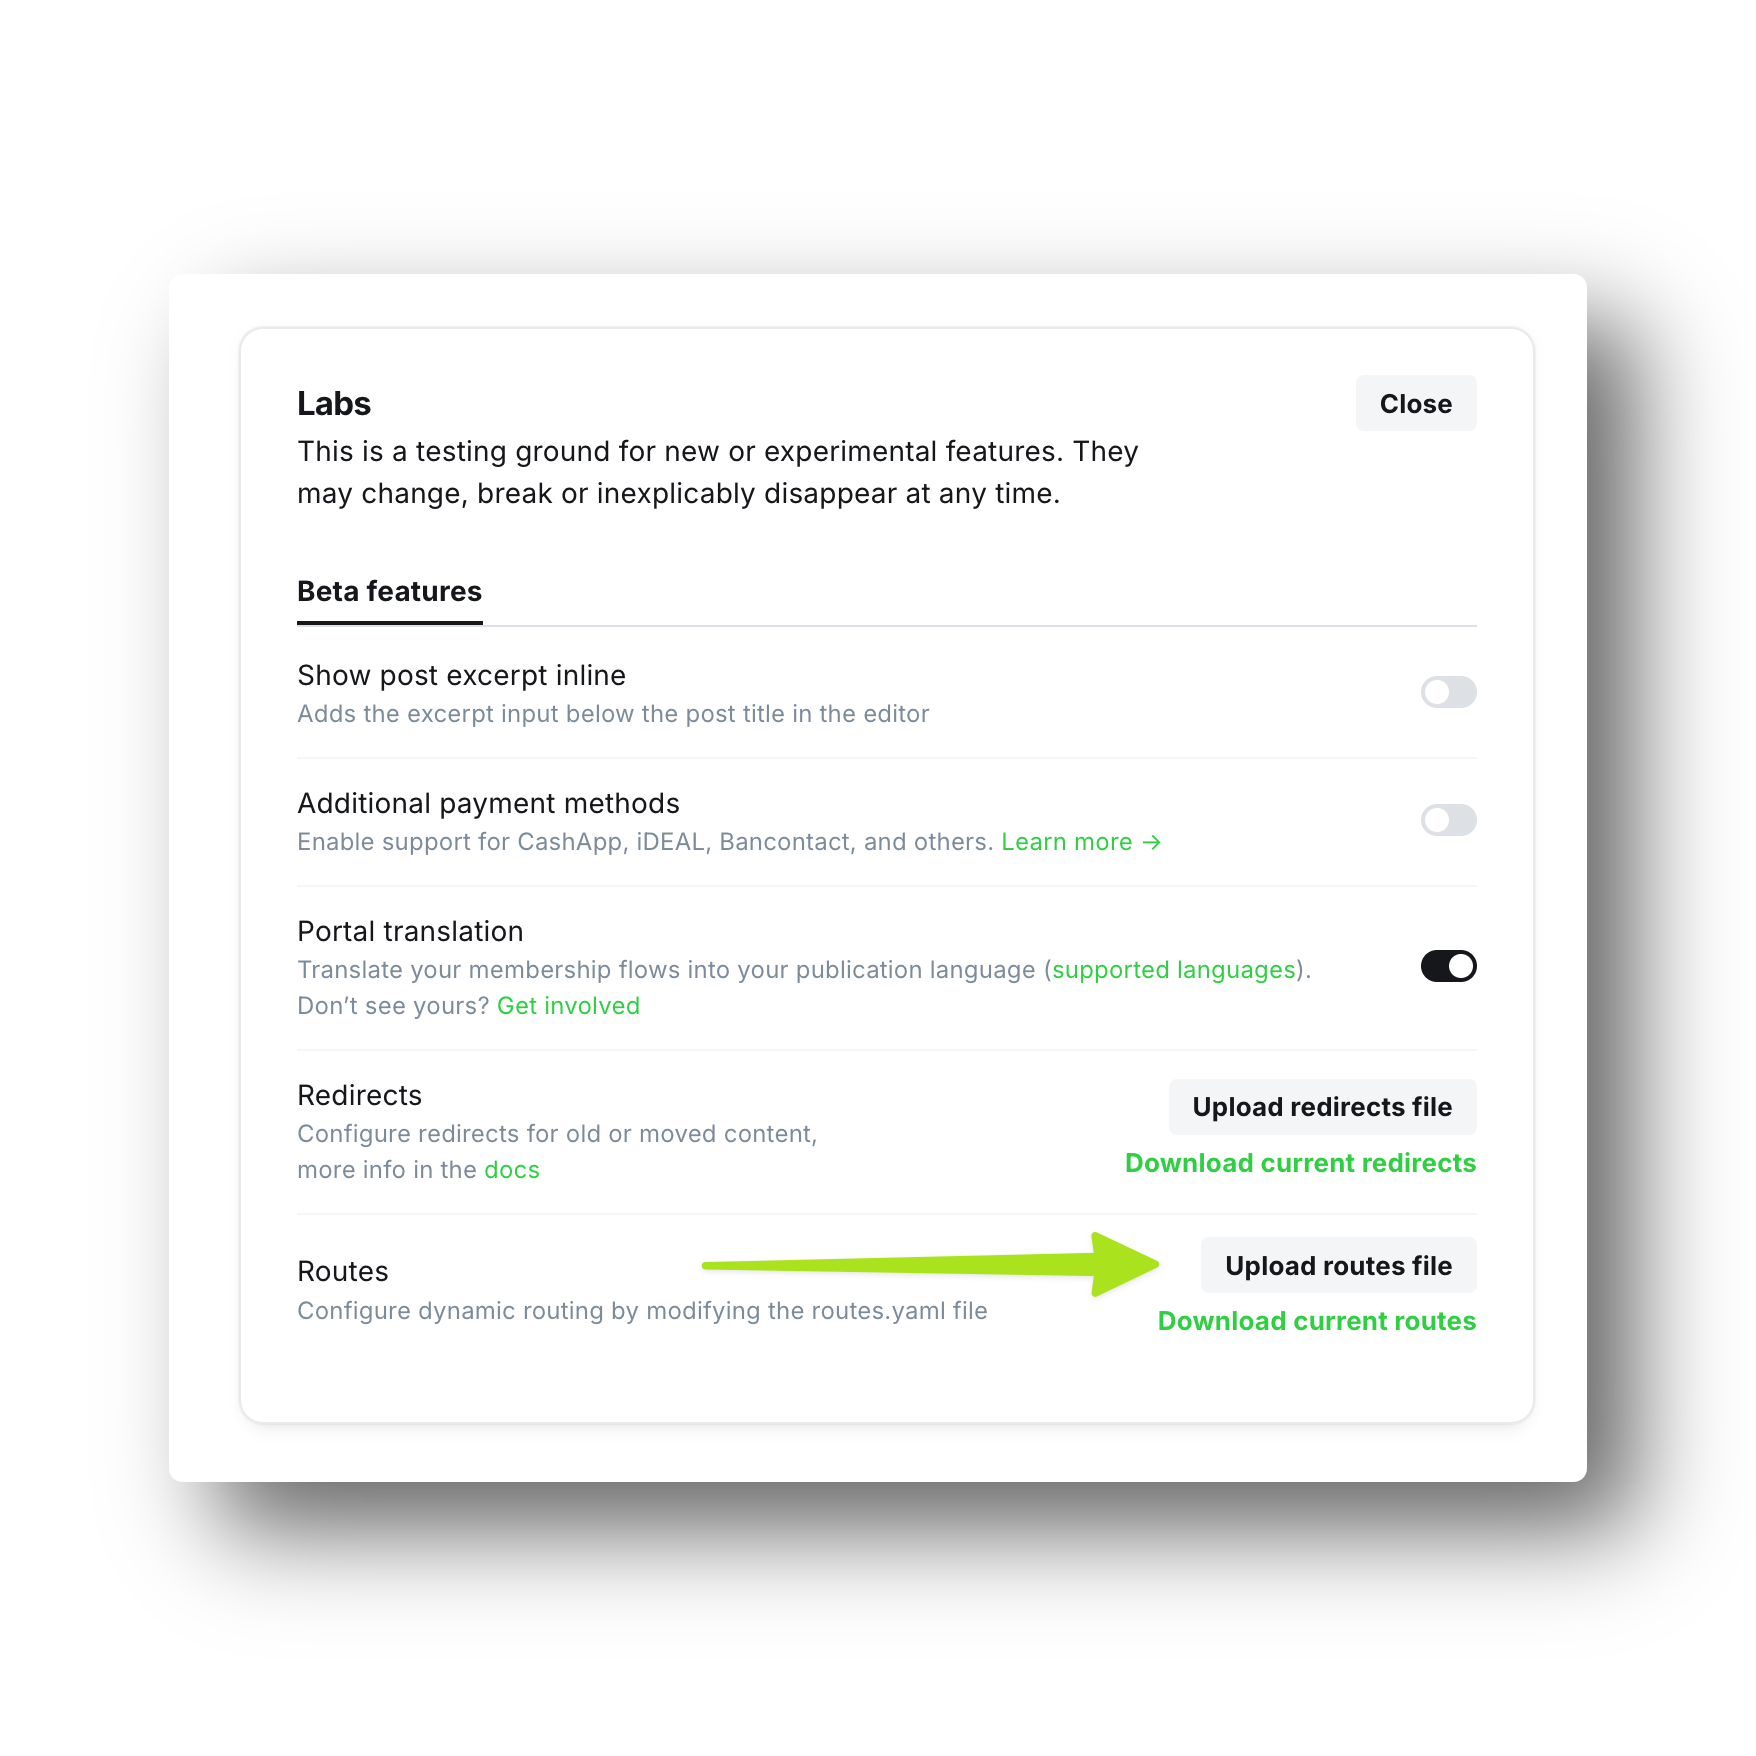
Routes (required)
You must do this for the theme to function correctly.
- In Ghost Amin to to
Settings → Labs (under 'Advanced' heading) → Open - Click
Upload routes file. Note: uploading a new routes file will overwrite your existing routes. We recommend clickingDownload current routesfirst to make a backup. - Upload the included
routes.yamlfile
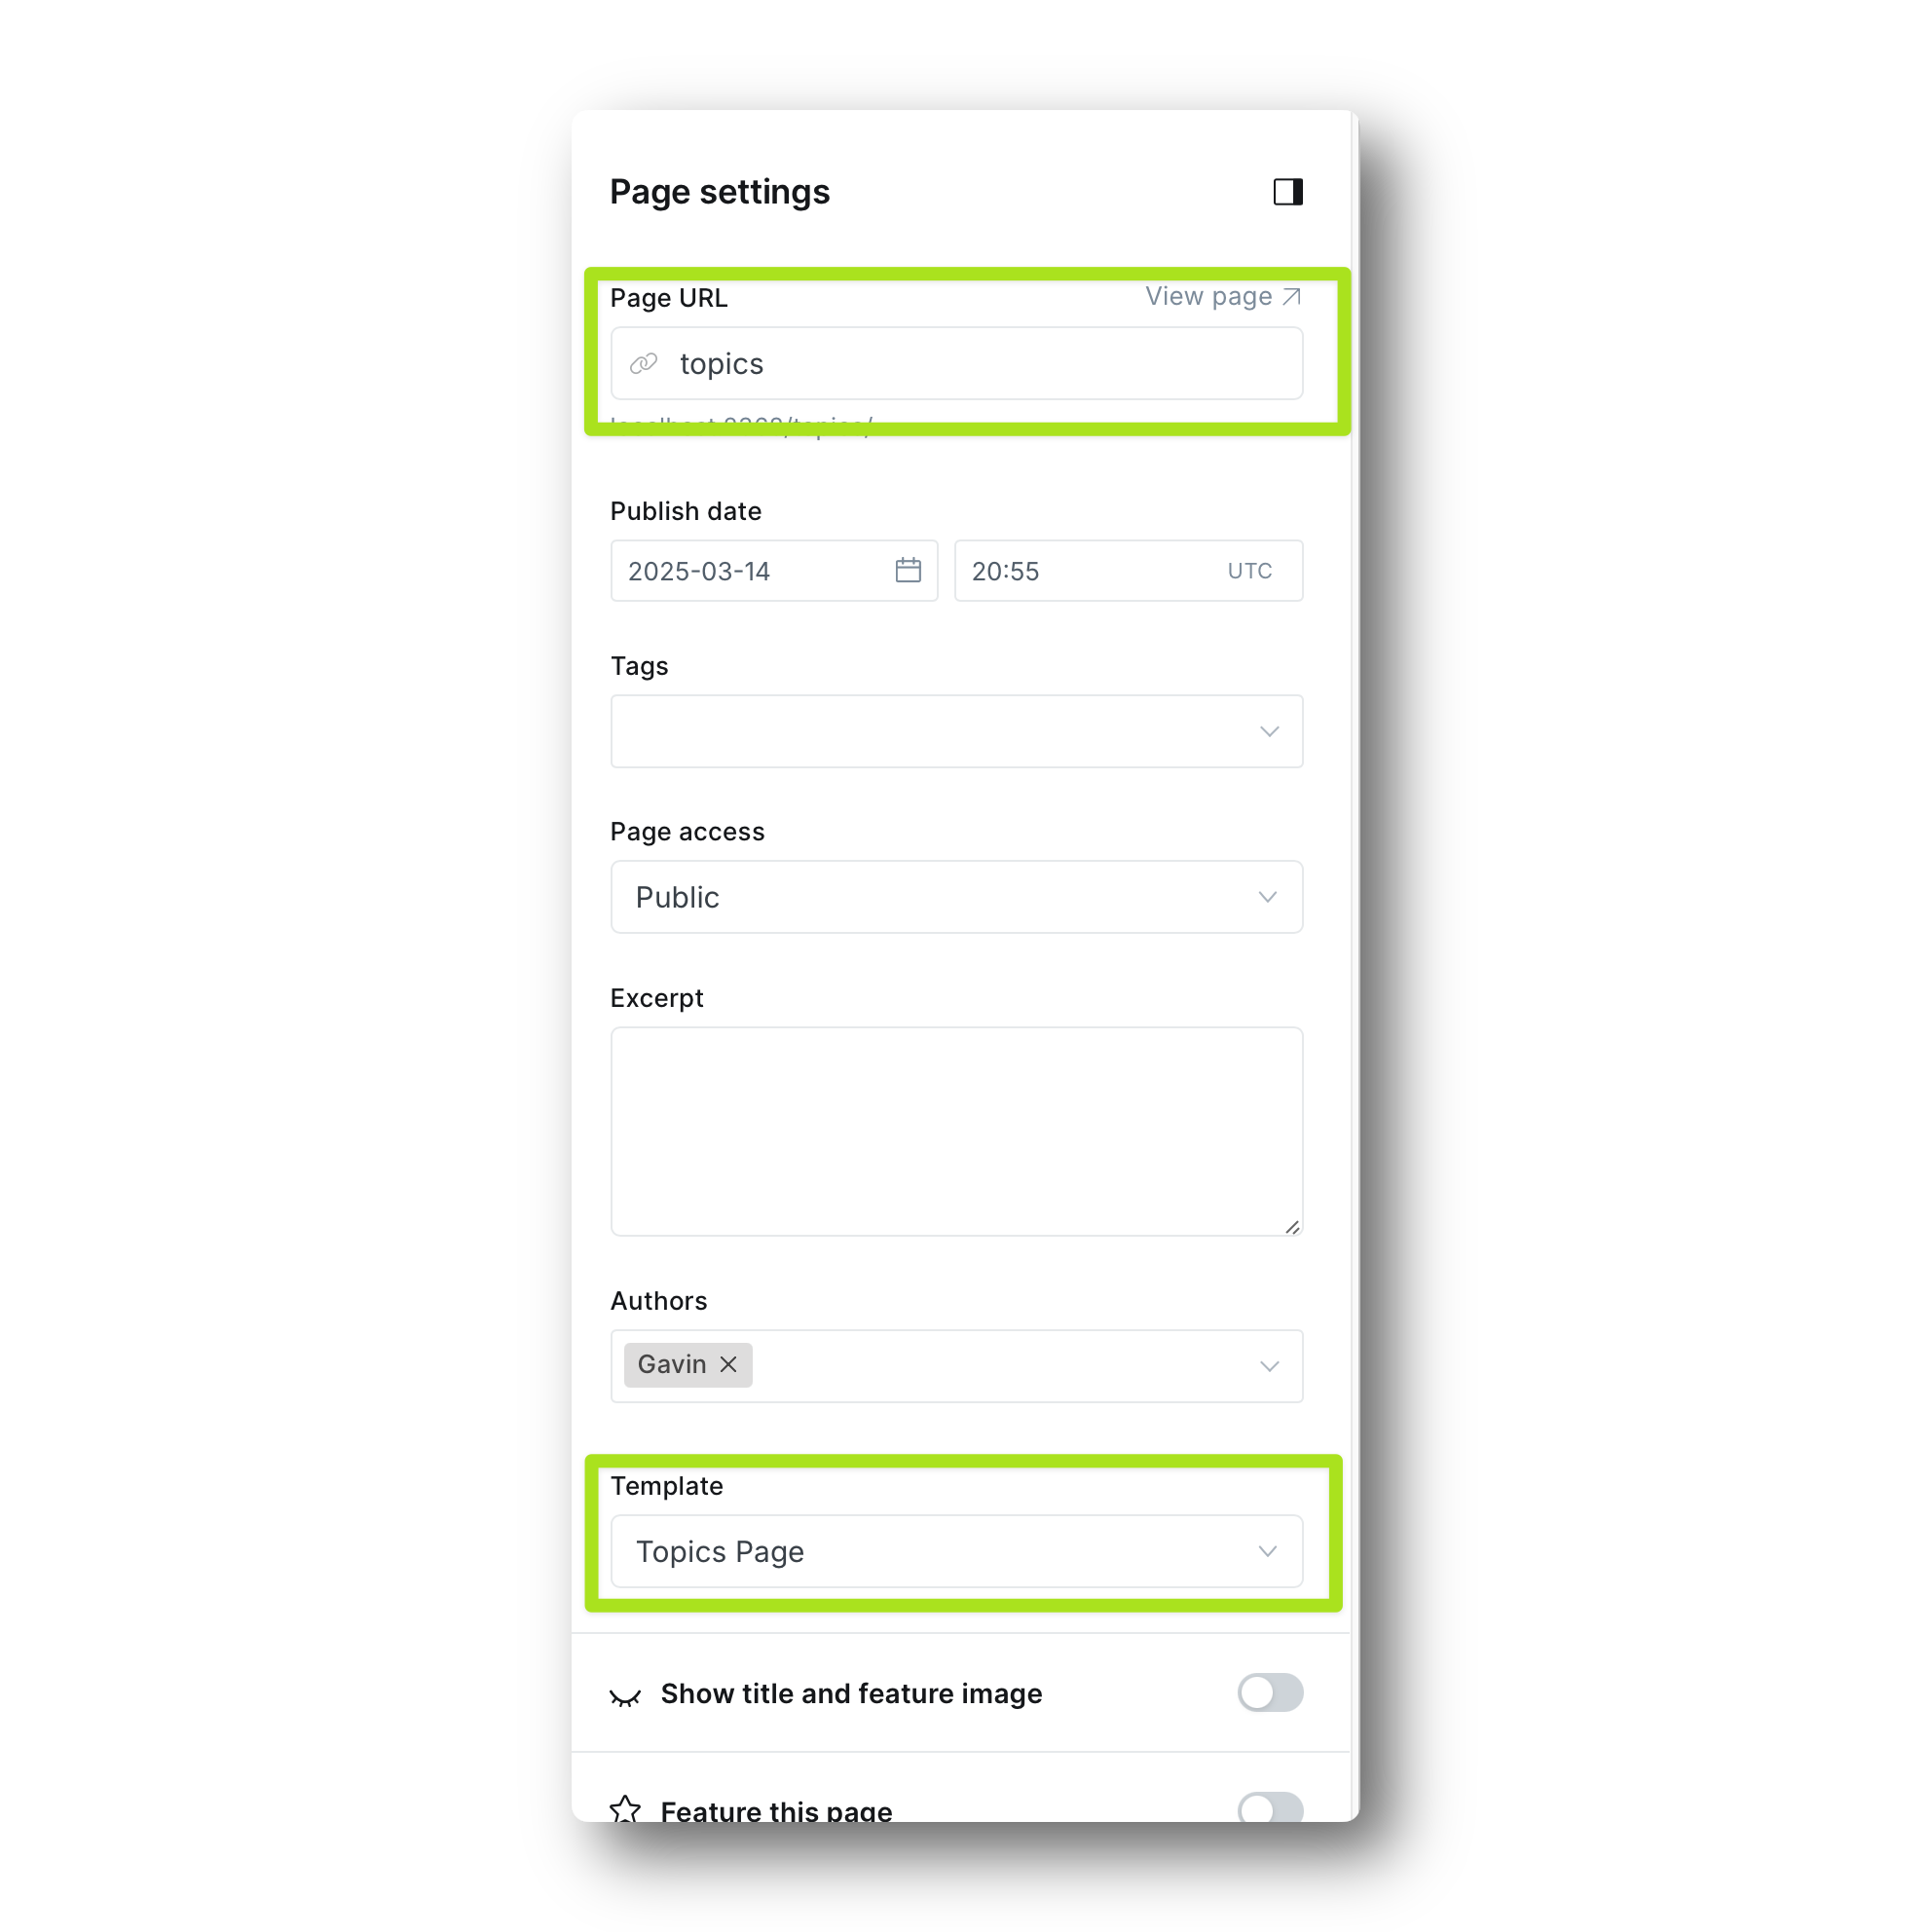
Creating a Topics page (optional but highly recommended)
- Create a new page (not post). Call it ‘Topics’.
- In the sidebar, choose
Template → Topics Page. Ensure thePage URLis also ‘topics’. - Add this page to the navigation at
Settings → Navigation → Customize → Primary
Creating an FAQs page (optional)
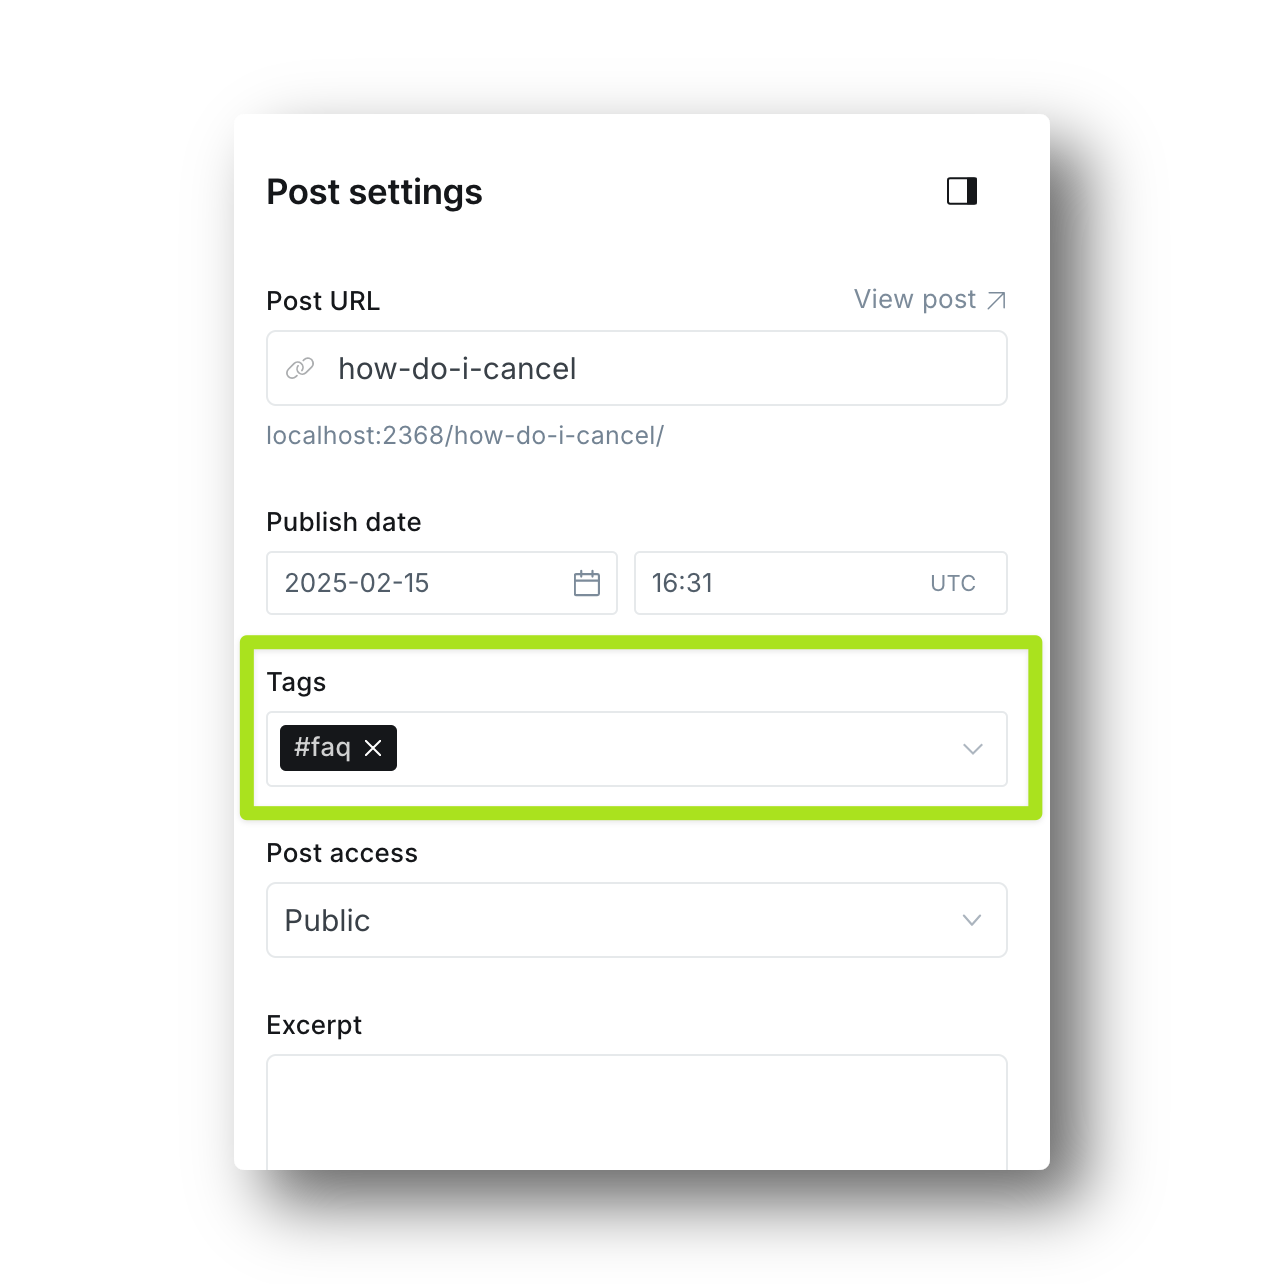
First create some FAQ posts:
- Create a new post. Set the title to a question, e.g. ‘How do I upgrade my account’. Set the body to the answer. We recommend keeping this short and simple.
In the sidebar, tag this post as #faq. The hash makes this tag internal only so users won’t see it.
Now create the FAQ listing page:
- Create a new page (not post). Give it any title, but we recommend ‘FAQs’.
- In the sidebar, choose
Template → FAQs Page - Add this page to the navigation at
Settings → Navigation → Customize → Primary
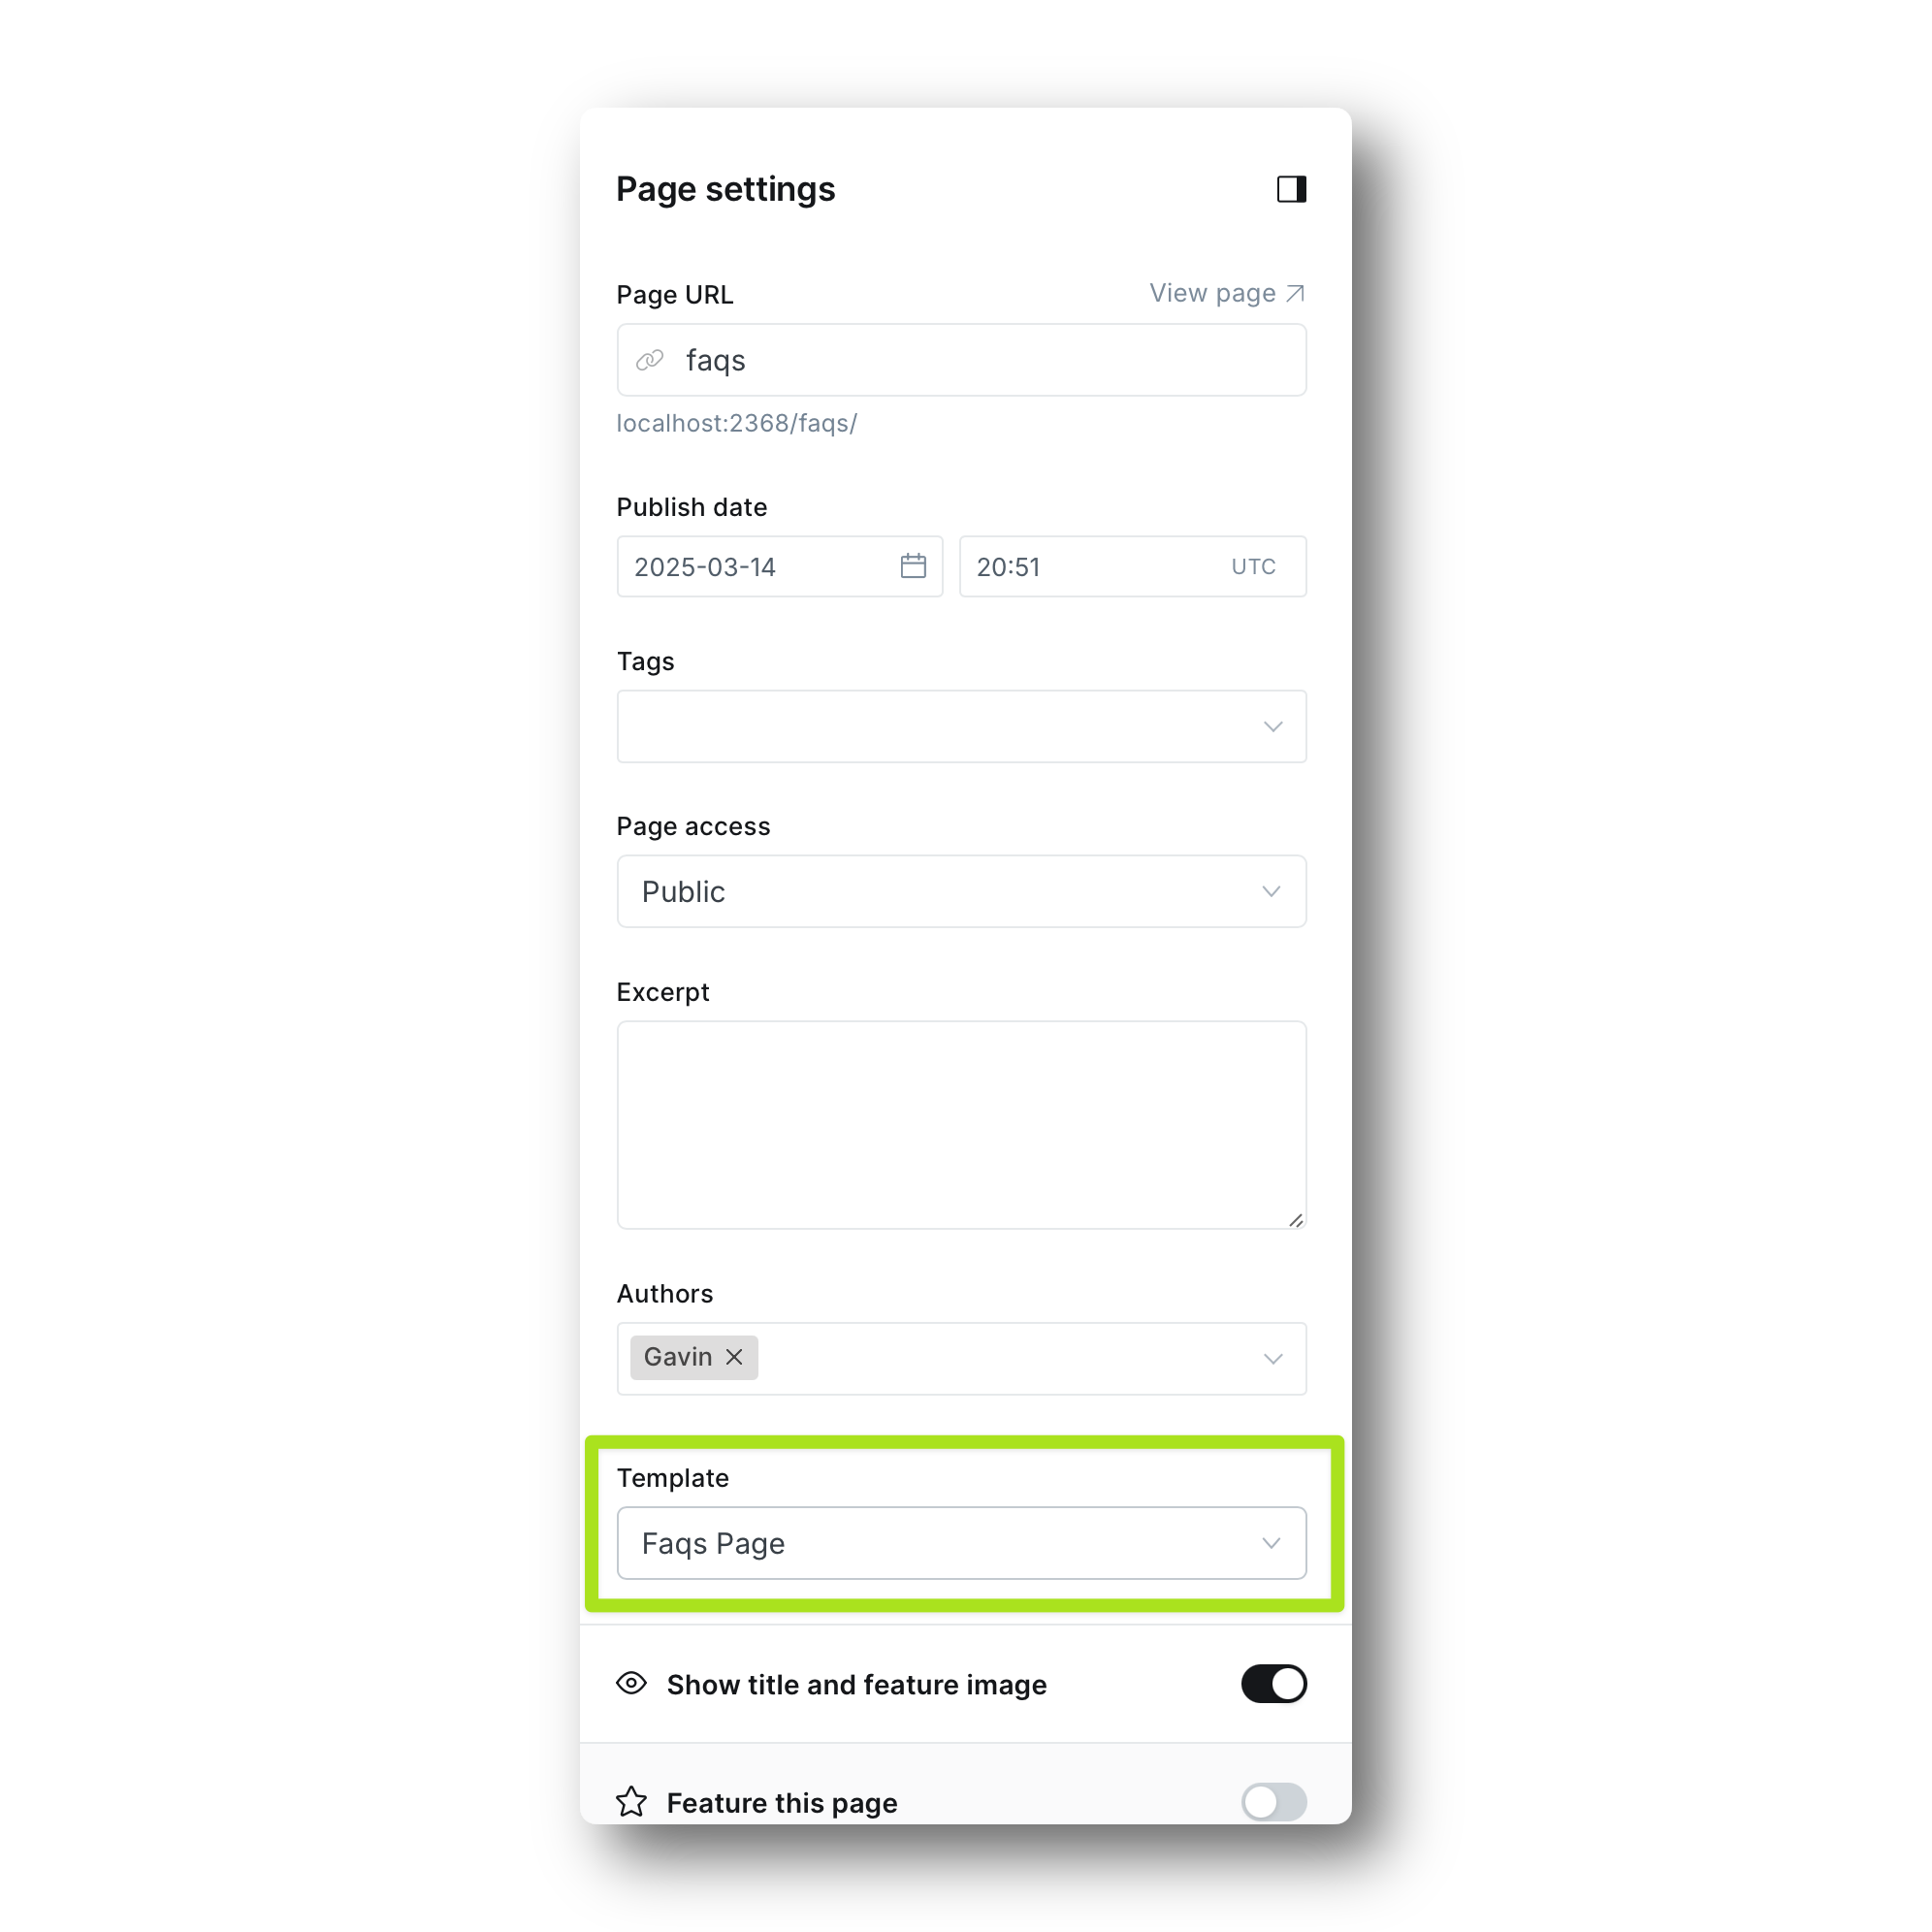
This page will now display any posts tagged #faq. The homepage will also display an FAQs block with 6 posts.
Creating a Changelog page (optional)
The changelog template lets you display a series of milestones (usually dates or version numbers) in a visually appealing way.
- Create a new page (not post). Set the title to 'Changelog' (or anything you like)
- In the sidebar, choose
Template → Changelog Page - In the post body, you must start each milestone with a
h2. This becomes the marker on the timeline. Works best if every milestone has similar content (e.g. a date or a release version number), followed by ah3describing the milestone in more detail. - Add this page to the navigation at at
Settings → Navigation → Customize → Primary
Populating the homepage
The homepage is made up of blocks which pull content from various places, outlined below.
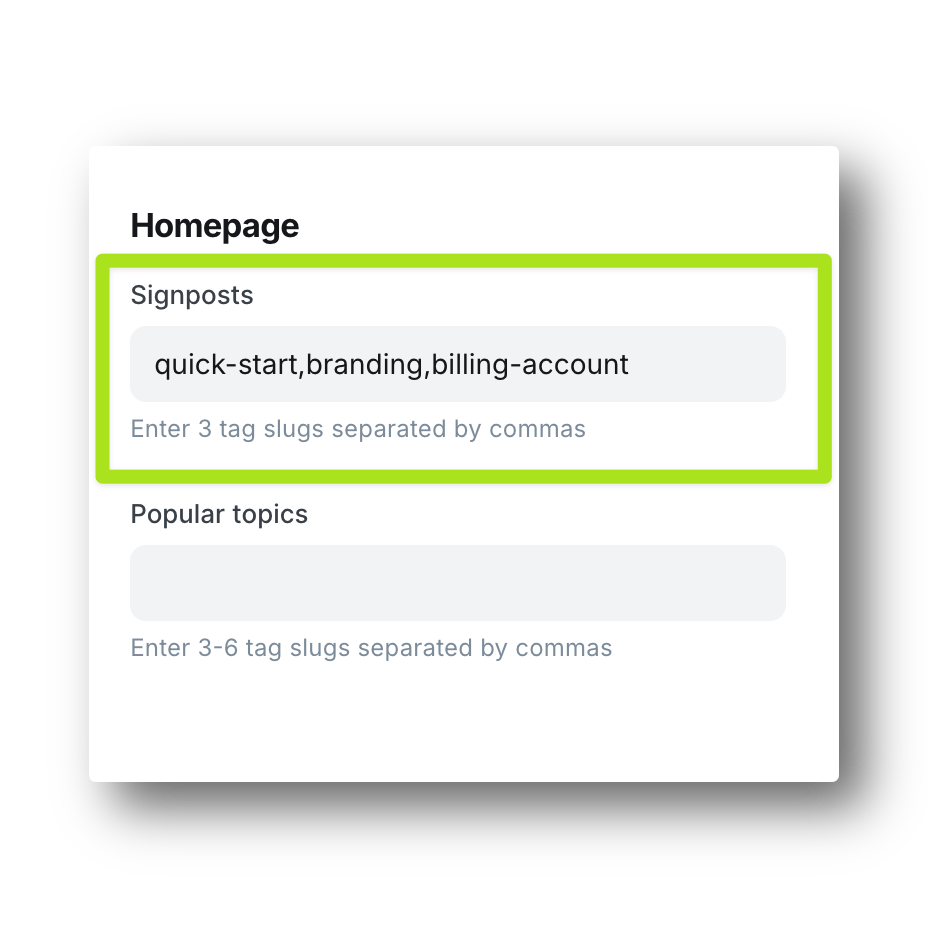
Signposts
Use this to highlight three main topics.
At Settings → Design & branding → Theme → Signposts, enter 3 tag slugs separated by commas. If left blank, this block won’t appear.
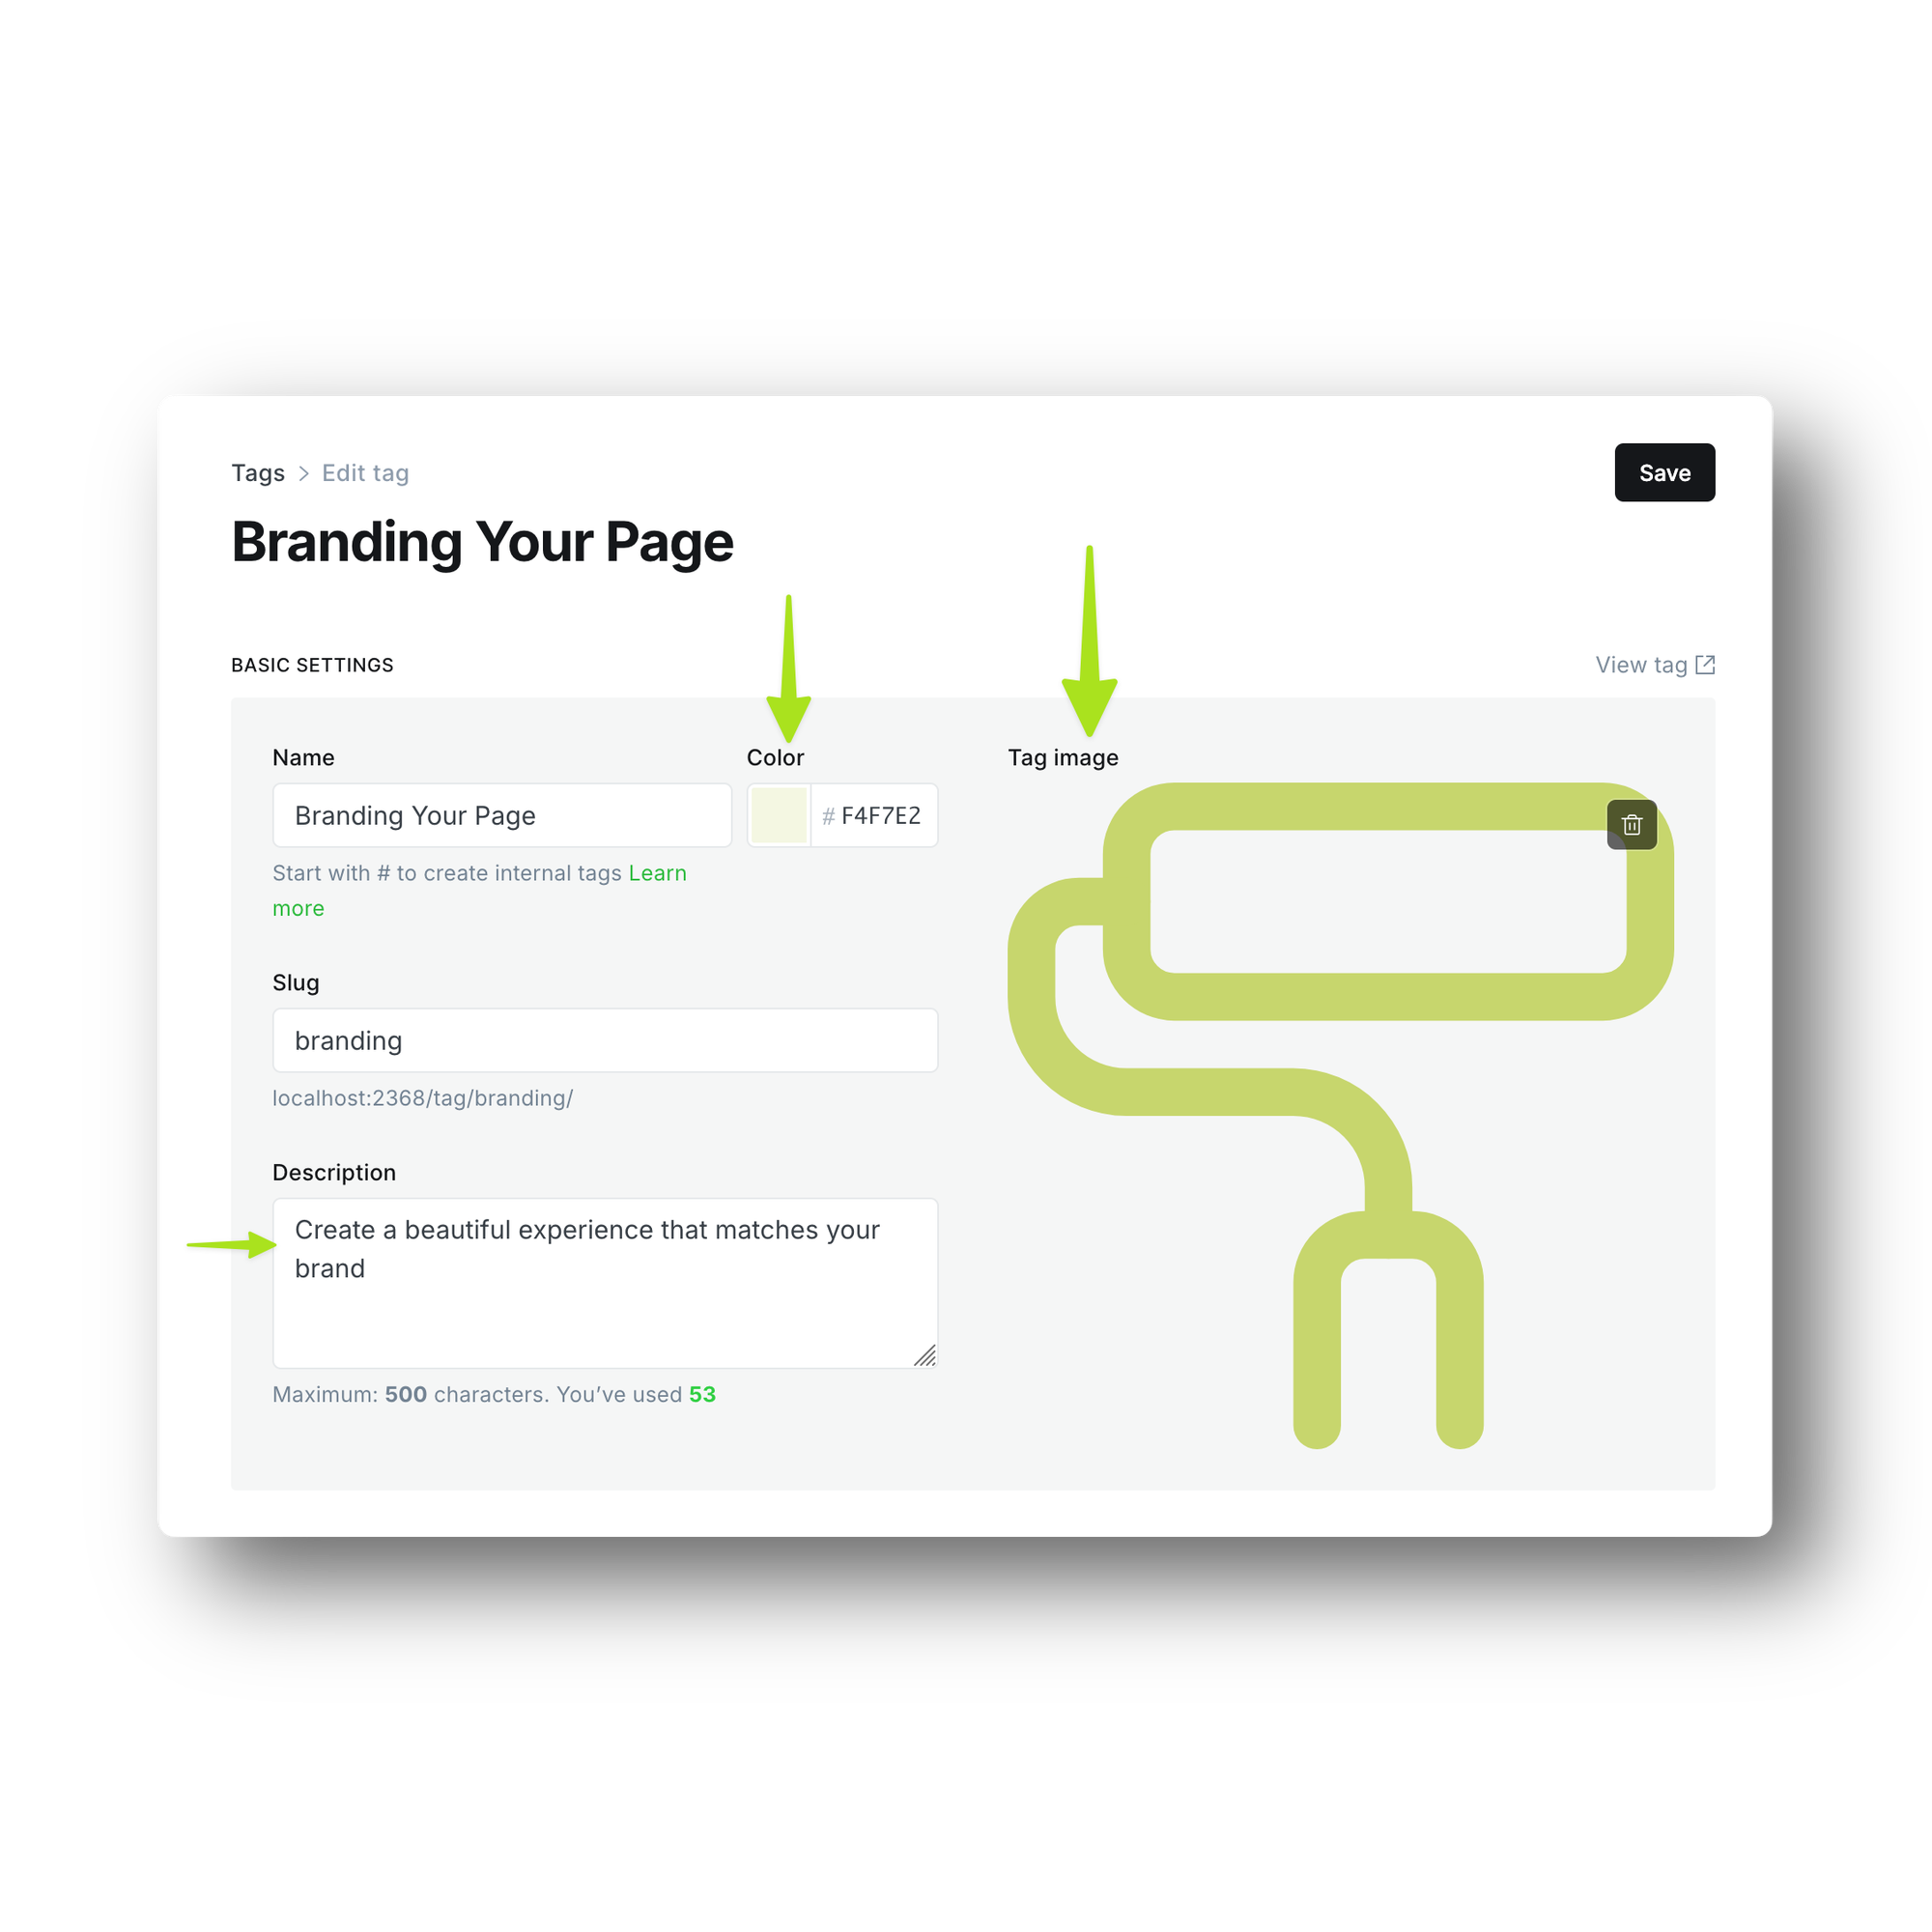
Each tag should have a Tag image (SVG icon), Color and Description (recommend max 80 characters) set at Tags → [Tag Name] → Edit tag.
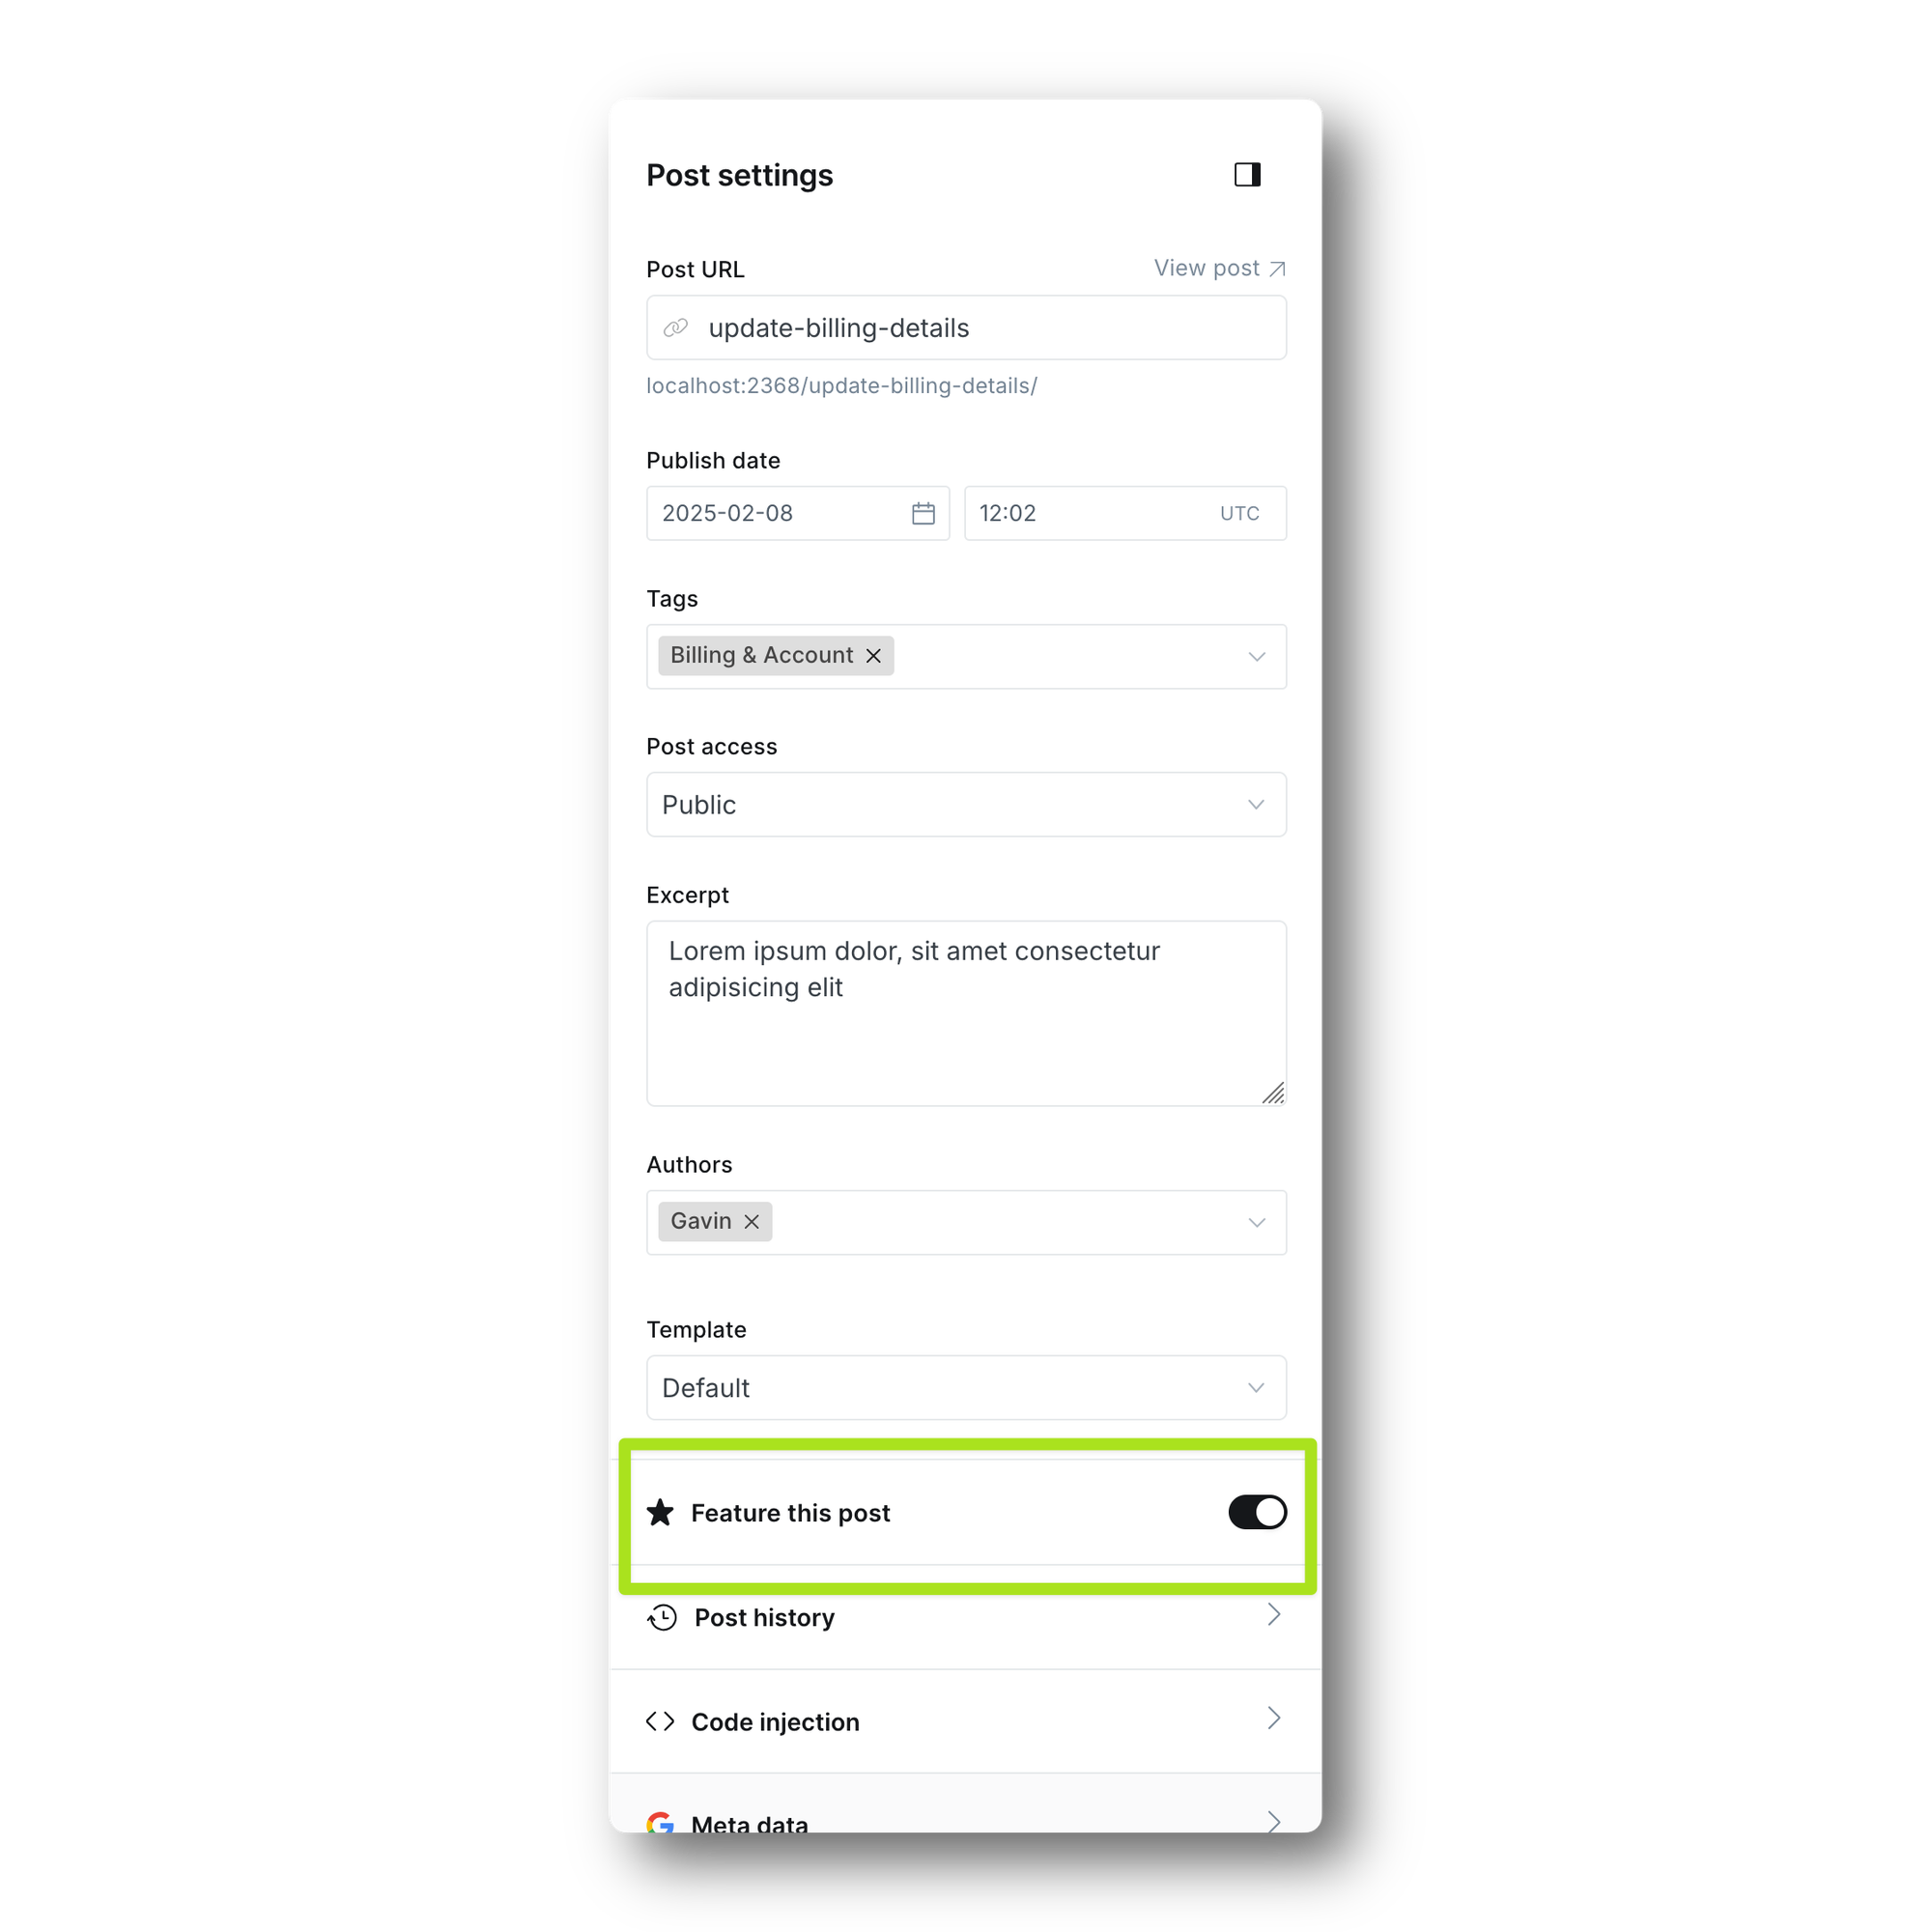
Featured articles
This displays any posts which have been marked as featured at Post → [Post Title] → Sidebar → Feature this post.
Recommend approx 6 posts. If left blank, this block won’t appear.
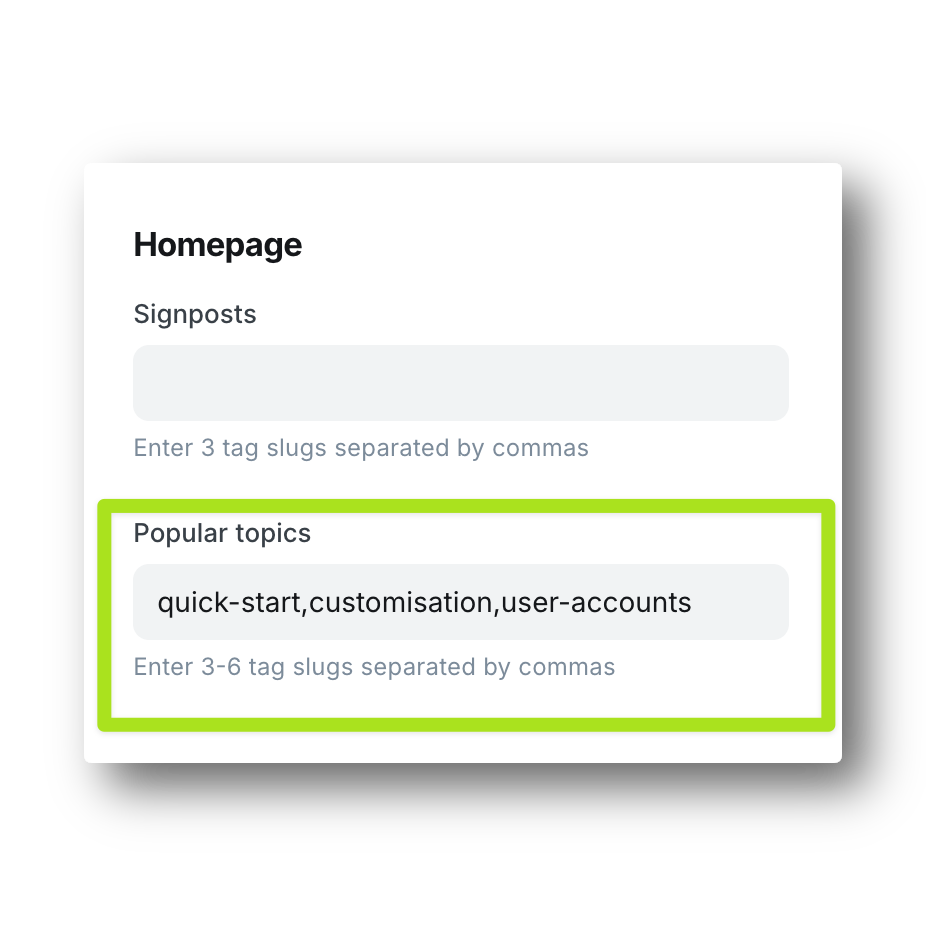
Popular topics
This displays a card for each topic, with up to 6 posts for each topic.
At Settings → Design & branding → Theme → Popular Topics, enter 3 tag slugs separated by commas. If left blank, this block won’t appear.
Adding a call to action
This displays a call to action at the bottom of most pages.
Content is entered at Settings → Design & branding → Customize → Theme → CTA heading/text/button etc. If no CTA heading is provided, this block won’t appear.
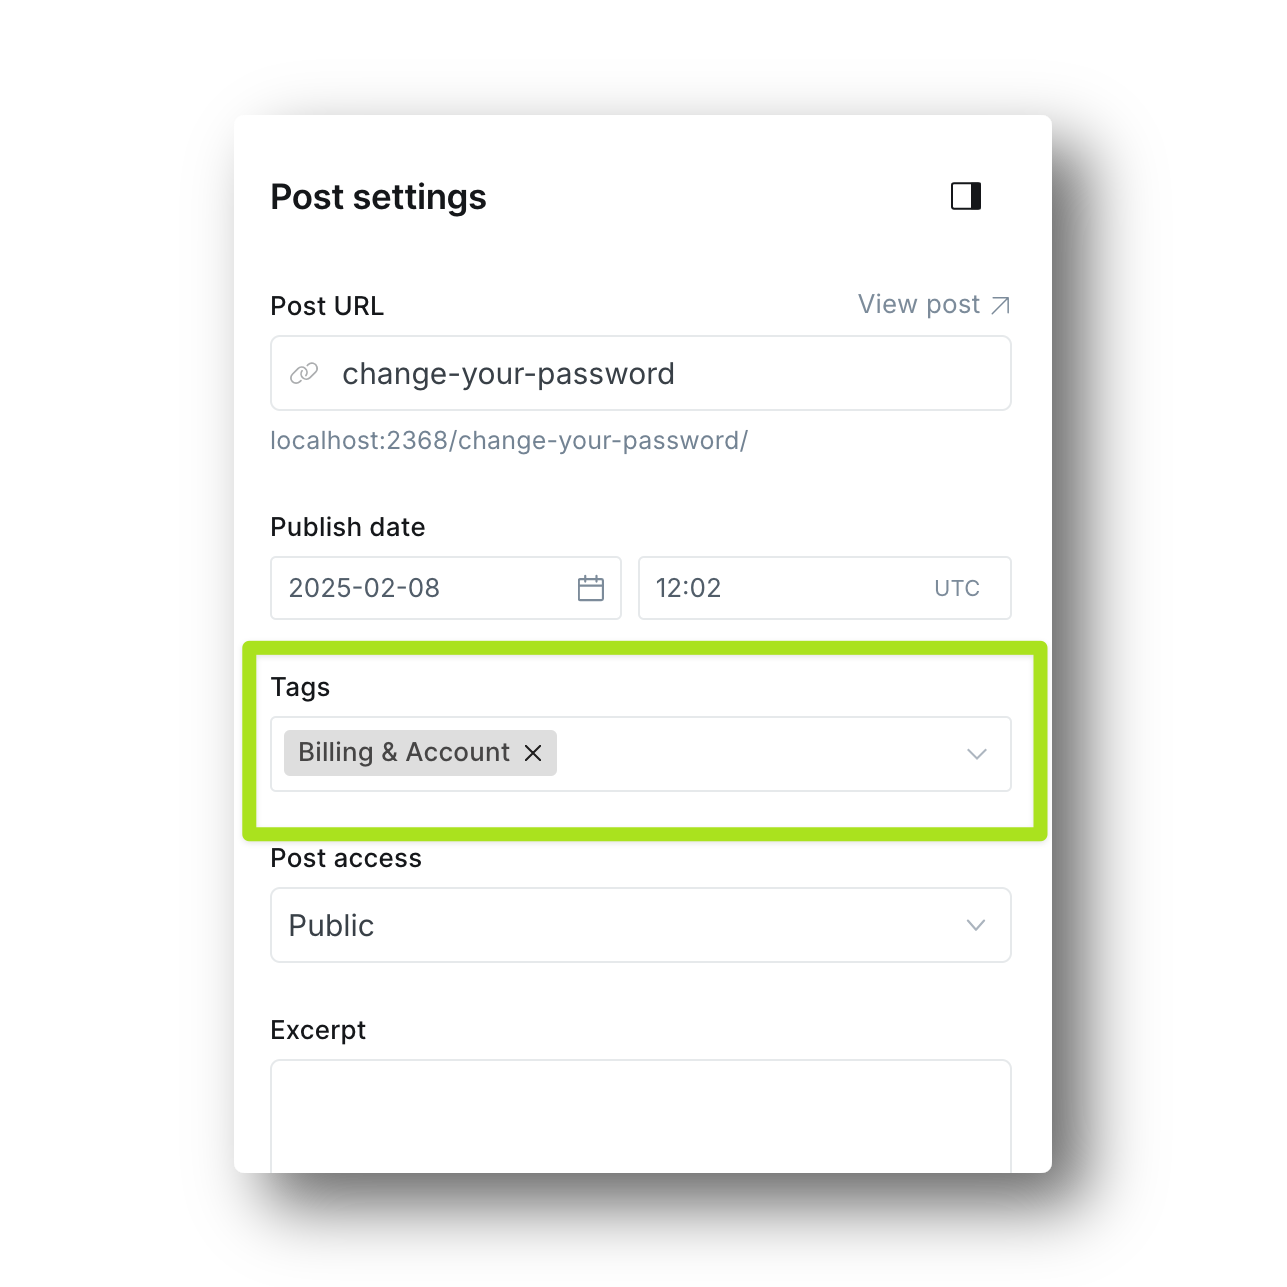
Creating topics
Each ‘topic’ is a tag in Ghost. Use these to create groups of articles. E.g. ‘Account and Billing’ and ‘Getting Started’.
We recommend only adding one tag to each post, but you can add multiple tags if needed. Only one tag will be output in breadcrumb navigation, so you should make the first tag the ‘main’ tag.
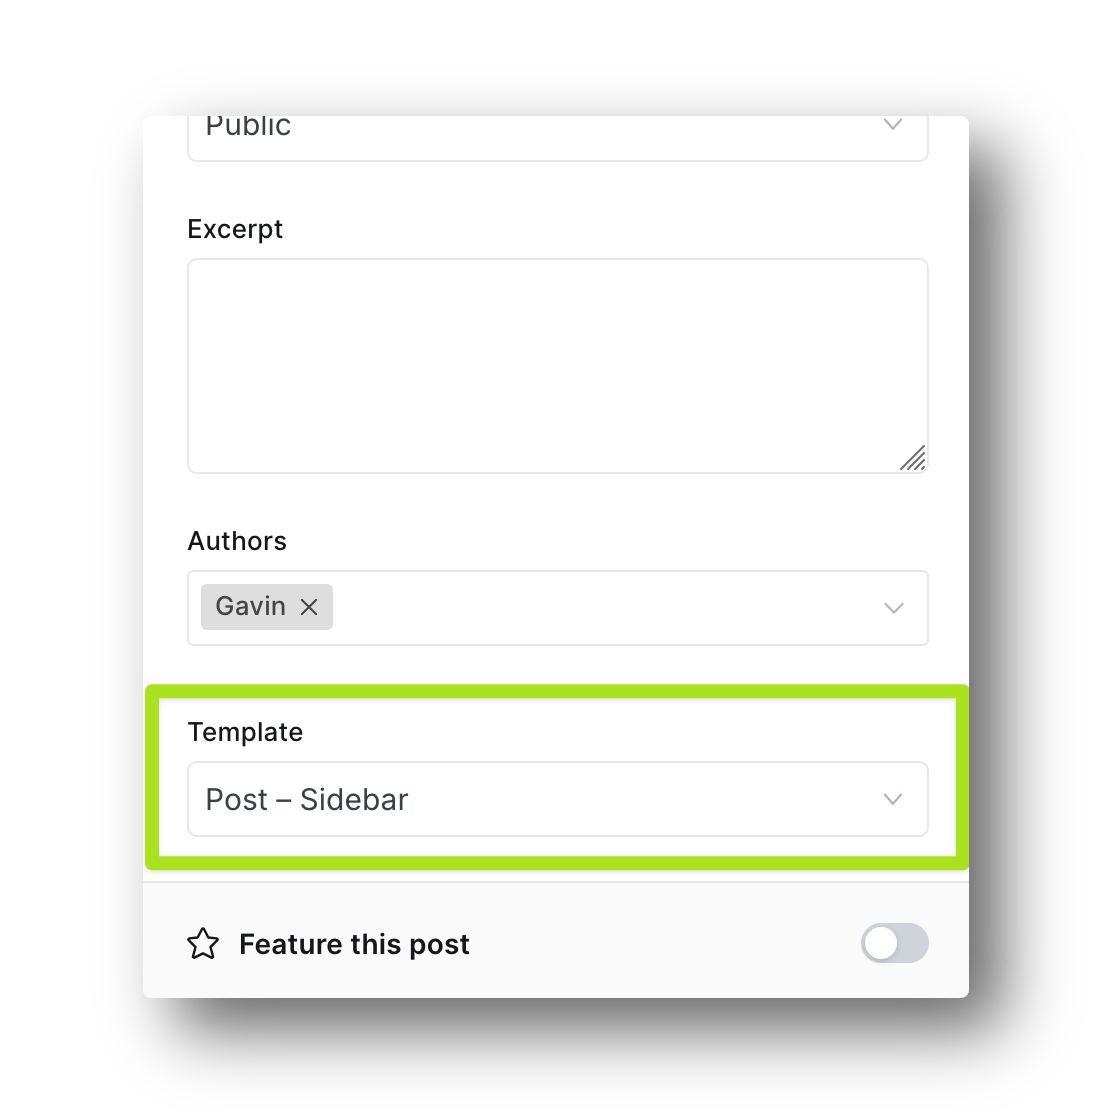
Adding a table of contents sidebar to articles
When creating a post, in the sidebar choose Template → Default for a standard single-column post.
Choose Template → Post – Sidebar to add a sidebar with a table of contents. This automatically inserts a table of contents with in-page links to each of your Heading 2 and Heading 3 headings.
Adding a contact page with support ticket form
Add a contact page so users can submit a support request ticket form. You need to have an account with a form endpoint service like Getform, Formspree, Kwes or Formkeep.
First, add your form endpoint:
- Generate your endpoint. You do this within your form endpoint service by creating a new form (don’t add any fields). E.g. instructions for Getform and Formspree. I till look something like
https://formspree.io/f/abcdxyz - Paste this endpoint (e.g. into
Settings → Design & branding → Customize → Site-wide → Contact form endpointand hit save.
Now, add a contact page
- Create a new page (not post). You can call it anything, e.g. ‘Contact’ or ‘New Support Ticket’
- In the sidebar, choose
Template → Contact Page - Add this page to the navigation at
Settings → Navigation → Customize → Primary - Optional: If you want this to appear as a button in the navigation, go to
Settings → Design & branding → Customize → Site-wideand enableLast nav item is button
Optional: add a confirmation page
Most endpoint services allow you to redirect to a custom URL after form submission. We recommend creating a page using the Default template, calling it something like ‘Thank You’, and setting your endpoint service to point at this after submission.
Customising the theme
The theme provides a range of carefully selected options more which can totally transform them look & feel of the site, without being overwhelming.
In Ghost Admin, open Settings → Design & branding → Customize. In the Brand tab you will see Ghost’s default customisation settings. In the Theme tab you will find settings specific to the theme. Some of these relate to content and are explained above. Others relate to design:
Changing colors
- Open
Settings → Design & branding → Customize - In the
Brandtab, choose anAccent color. This is used for buttons and other accents. - In the
Themetab, choose whichGraysto use. EitherWarmorCool
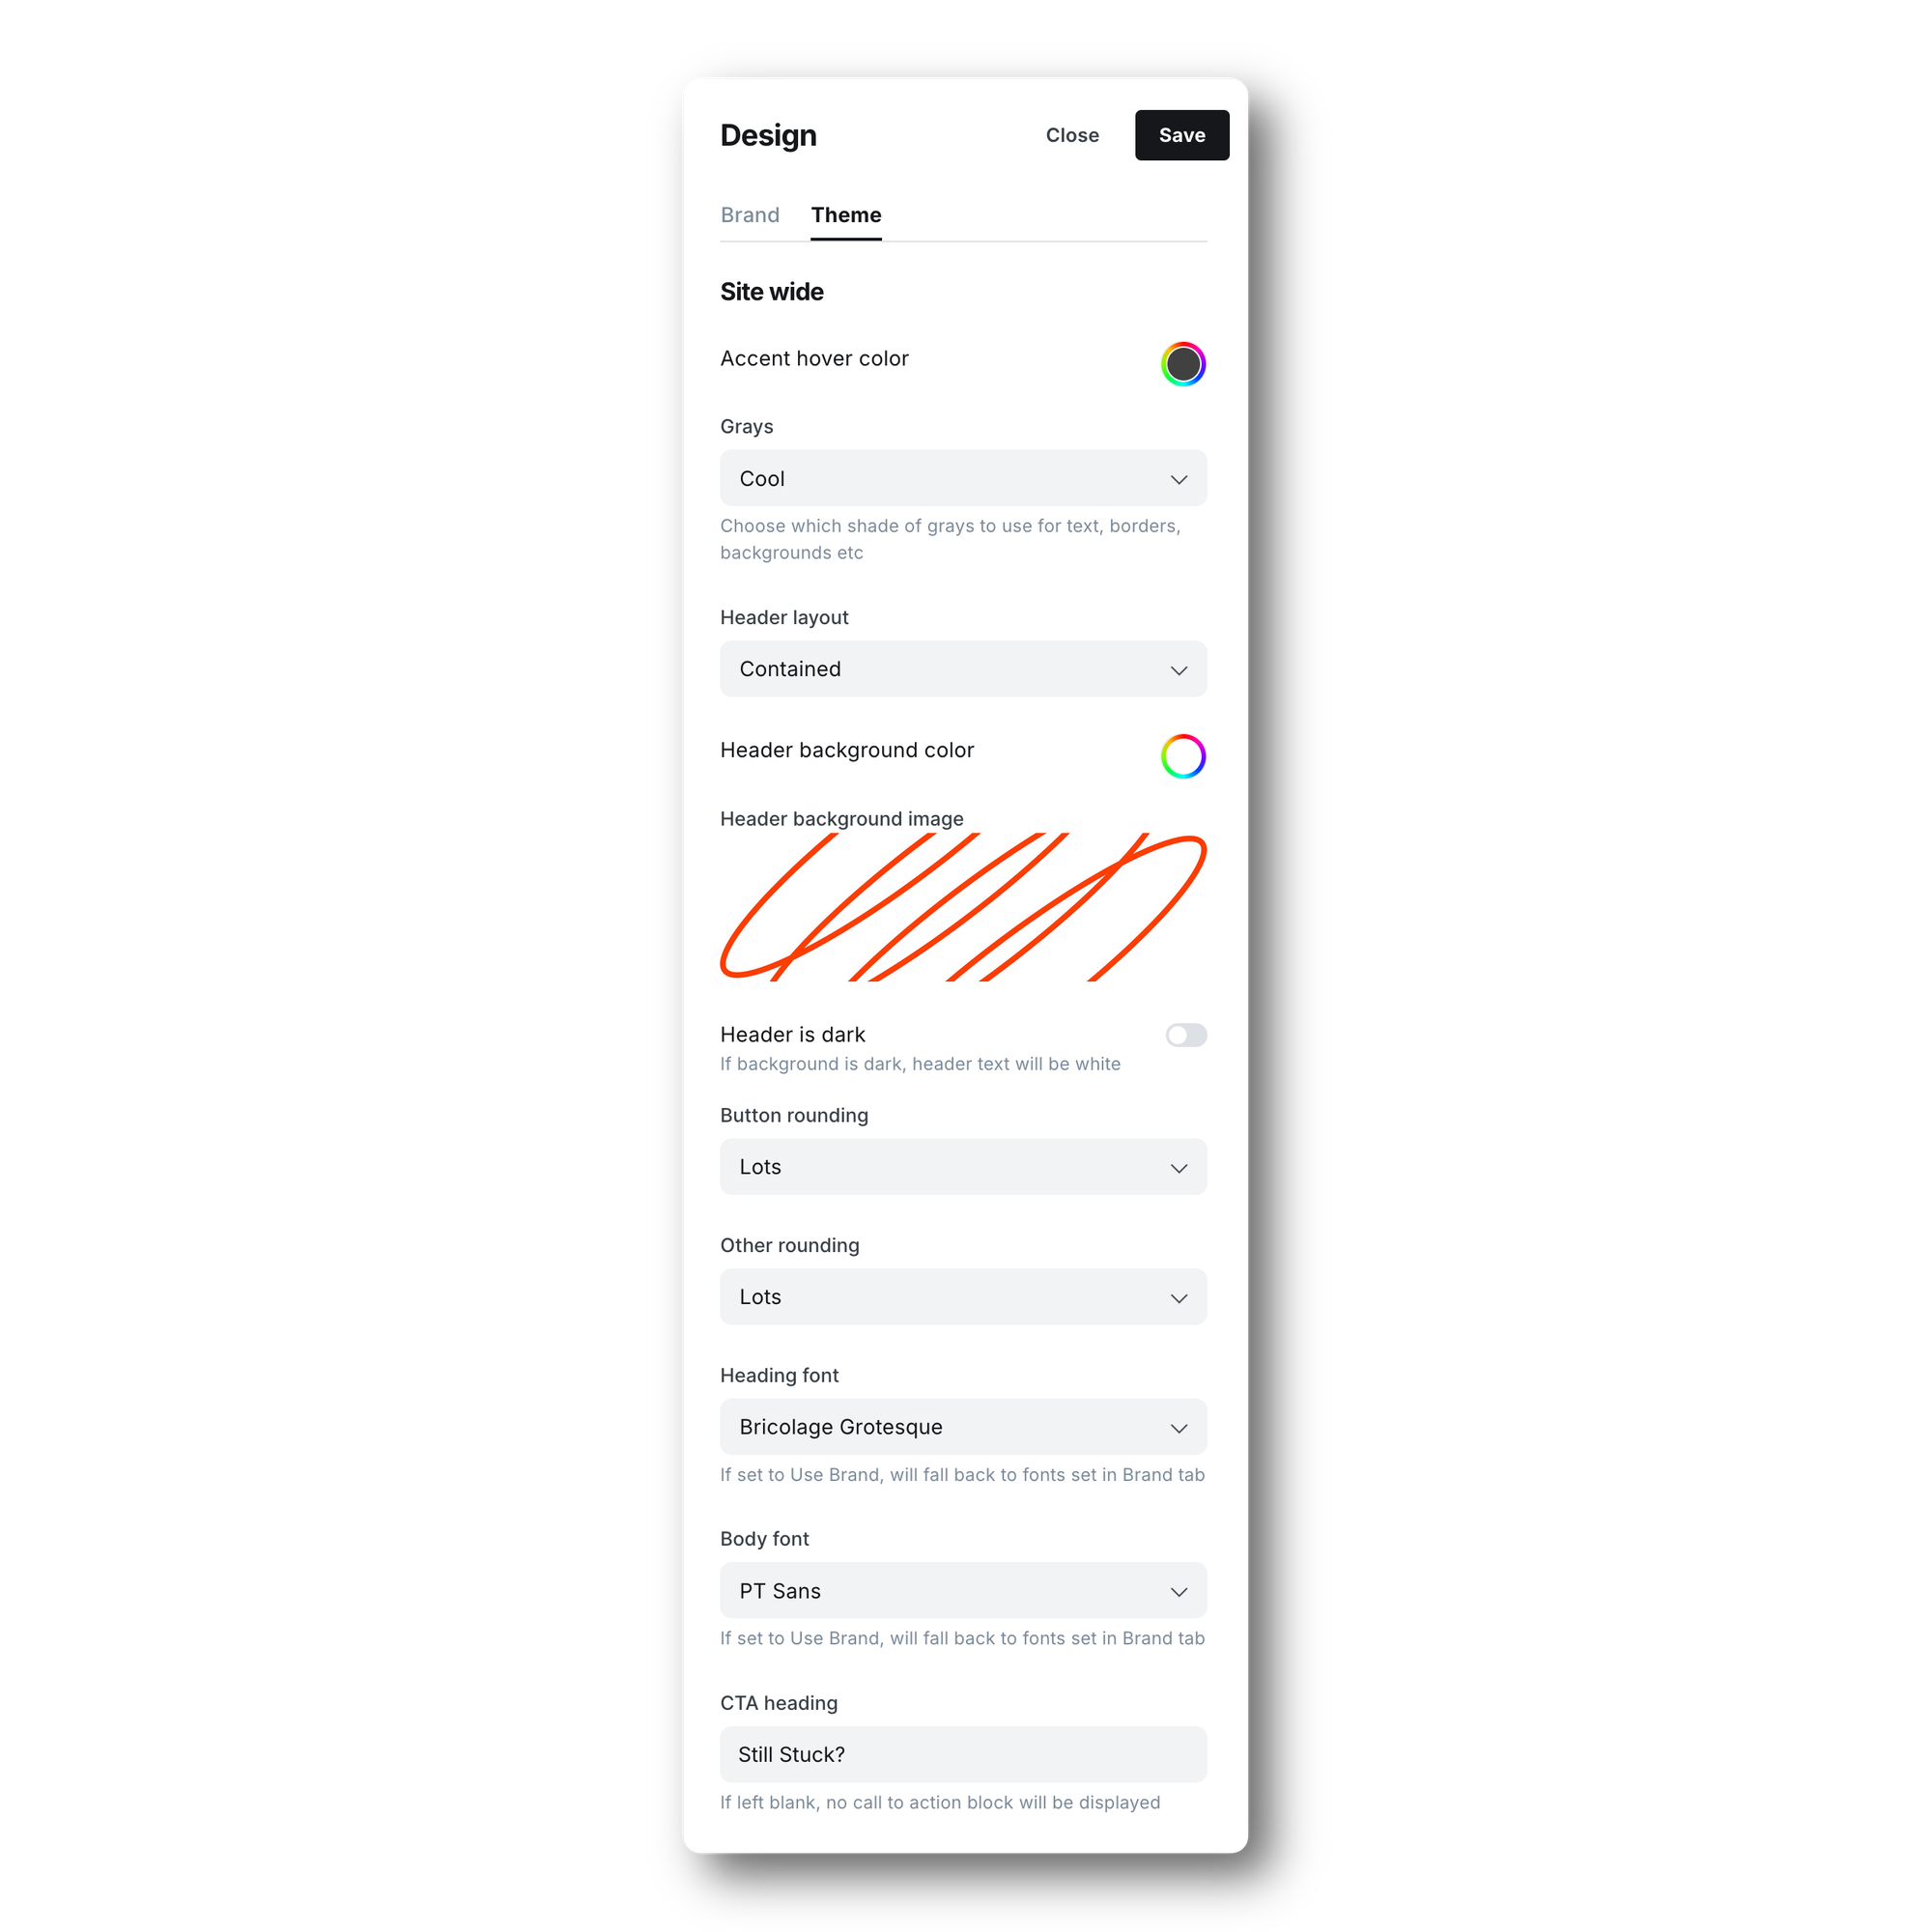
Changing header design
A few changes to the header can totally transform he feel of the theme.
- Open
Settings → Design & branding → Customize → Theme - Choose a
Header layout-Full WidthorContained(works well with rounded corner options, see below) - Choose a
Header background color. We recommend doing this even if using a background image, as a fallback. - Choose a
Header background image(optional). We have provided some examples in theheader-backgroundsfolder for inspiration. See tip below if you need to customise image sizing. - If your header background is dark, enable the
Header is darkoption. This will make text and buttons white to ensure legibility.
Changing border-radius rounding
- Open
Settings → Design & branding → Customize → Theme Button roundingcontrols the border-radius of buttonsOther roundingcontrols the border-radius of topic cards, search inputs, and the header (if itsHeader layoutis set toContained)
Changing fonts
- Open
Settings → Design & branding → CustomizeEither: - In the
Brandtab, use theHeading fontandBody fontfields to choose from Ghost’s fonts. - Or in the
Themetab, use theHeading fontandBody fontfields to choose from a wider selection of carefully curated fonts. All these fonts are free to use and served via Bunny so they are GDPR compliant
Tip: changing the logo size
- Go to
Settings → Code injection (under advanced) → Open - In the
Site headerfield, enter the below code. Replace{value}with your width, e.g.120px - Click
Savein top right
<style>
:root {
   --site-logo-width: {value};
}
</style>
Tip: adjusting the header background image
- Go to
Settings → Code injection (under advanced) → Open - In the
Site headerfield, enter custom CSS to rules for the.site-headerelement. For example, you could control the size and position using the code below. - Click
Savein top right
<style>
.site-header {
  background-size: 150% auto;
  background-position: top left;
}
</style>
Tip: adjusting the navigation breakpoint
If you have lots of navigation items, you might need to adjust when the navigation switches to the hamburger off-canvas panel.
- Go to
Settings → Code injection (under advanced) → Open - In the
Site headerfield, enter the below code. Replace{value}with your width, e.g.1024px - Click
Savein top right
<style>
:root {
   --breakpoint-nav: {value};
}
</style>
Tip: adjusting syntax highlighting
Code highlighting is handled using the Prism.js library. In partials/prism.hbs you can choose which Prism.js theme to use.
Tip: enabling comments
This theme isn't optimised specifically for comments (as this is rarely required for documentation sites), but it does support them. See Ghost documentation for details on how to enable comments. Once comments are enabled, logged in users will have the ability to leave comments on posts and pages. Others will see a prompt to sign in or sign up. We recommend you disable Settings → Portal → Look & feel → Show portal button.
Tip: showing homepage heading and/or hiding search
If you would like to display a large h1 on the homepage before the search input, add the following to Settings → Code Injection → Site Header. The heading is taken from Settings → Title & description → Site description
<style>
	#homepage-h1 {
		display: block;
	}
</style>
If you would like to hide the big search input, add the following to Settings → Code Injection → Site Header.
<style>
	#header-search {
		display: none;
	}
</style>
Note if you are showing only the h1, we also suggest removing the h1 bottom margin like so:
	<style>
		#homepage-h1 {
			display: block;
			margin-bottom: 0;
		}
	</style>
Third-party credits
We're grateful to the following resources which are used throughout the theme:
- Utility CSS using Tailwind
- Lightweight Javascript interactivity using Alpine.js
- Syntax highlighting using Prism.js
- Sidebar table of contents using Tocbot
- Open-source fonts loaded via Bunny Fonts
- Images in theme demo are from Unsplash and use the Unsplash License. They aren't included in the theme item itself.
Changelog
1.2.1 - 2026-01-25
Small changes to meet Themeforest submission requirements:
- Rename
index.csstostyle.css - Rename
index.jstoscripts.js - Add changelog to readme
- Add third party credits to readme
1.2.0 - 2026-01-19
- Add support for native Ghost comments
- Add ability to display a large
h1on homepage - Document ability to hide search input on homepage
- Fix issue where post 'tagged as' wrapper was output even if no tags present
1.1.0 - 2026-01-14
- Add new
Changelogcustom page template - Add ARIA labels and roles to various landmark elements
- Fix issue where table of contents wasn't scrollable on some screen sizes
1.0.1 - 2026-01-10
- Adjust navigation responsive breakpoints
- Update bug/support URLs in
package.json - Fix positioning of full viewport width editor cards in iOS
1.0.0 - 2025-11-13
First release